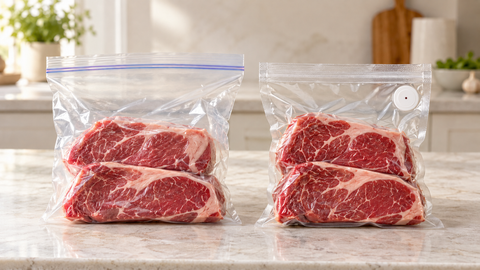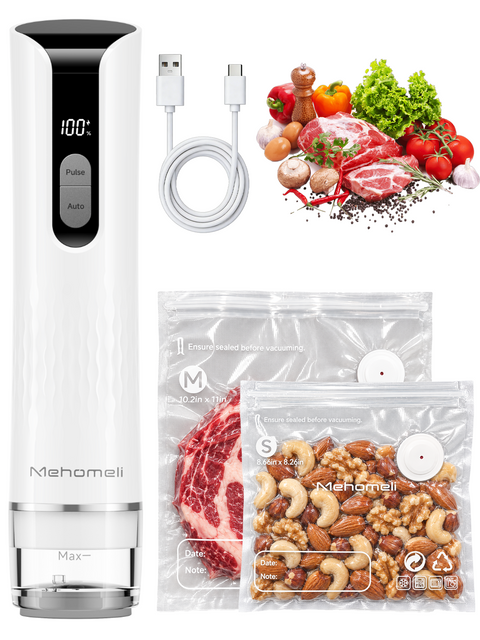
A handheld vacuum sealer can make everyday food storage easier, especially when you want to divide groceries into smaller portions or organize your freezer. Getting a good result starts with three simple details: a fully closed zipper, a clean valve, and a snug connection between the sealer and the bag.
This guide explains how to use a handheld vacuum sealer with compatible valve bags, what to check if a bag loses its vacuum, and how to store food afterward. Always follow the instructions for your particular sealer and bags.
What You’ll Need
- A charged handheld vacuum sealer
- Compatible vacuum zipper bags with an air valve
- Food prepared in suitable portions
- A clean, dry work surface
- A food-storage label or marker
Ordinary zipper bags do not have the valve needed for this setup. Before you begin, check that your bags are designed to work with your handheld sealer.
Step 1: Prepare and Portion Your Food
Divide food into amounts you expect to use at one time. For example, portion meat for a single meal rather than putting an entire bulk pack into one bag.
Start with clean hands and utensils, and keep raw meat separate from ready-to-eat foods. For cooked food, refrigerate promptly in shallow containers to cool it safely before vacuum packing. Do not leave it on the counter waiting to cool.
Step 2: Fill the Bag Without Overfilling
Choose a bag that holds your food comfortably while leaving enough room to close the zipper. Keep food away from the valve and follow any fill markings on the bag.
Wipe moisture, crumbs, or grease from the zipper area. A clean closure helps the zipper seal properly. Avoid placing loose liquid near the valve, where it could be drawn toward the pump.
Step 3: Close the Zipper Completely
Press the zipper closed from one end to the other. If your bag includes a sealing clip, use it as directed, then check the full length of the closure.
A small gap can let air back in even when the pump appears to work normally. Take a moment to check the corners and both ends of the zipper.
Step 4: Align the Sealer With the Valve
Place the bag on a flat surface with the valve accessible. Position the suction end of the handheld sealer directly over the valve, keeping it flush against the surface.
Start the pump according to your model’s instructions. Watch the bag draw closer around the food. If no air seems to move, stop and check the zipper, valve position, and connection before trying again.
Keep liquid away from the suction area. Stop immediately if moisture travels toward the pump, and follow the manufacturer’s directions before using it again.
Step 5: Check, Label, and Store
After stopping the pump as directed, remove it and check that the bag holds its vacuum. Label the bag with the contents and packing date, then store the food appropriately.
Vacuum packing does not sterilize food or replace refrigeration or freezing. Keep perishable food refrigerated at 40°F (4°C) or below, or frozen at 0°F (-18°C) or below. Follow recommended storage times for the specific food; vacuum packing does not reset a use-by date.
Why Is My Vacuum Bag Letting Air Back In?
If the bag loosens after sealing, check these common causes:
- An incomplete closure: Open the zipper, clean it, and close it fully again.
- Food or moisture near the valve: Reposition the contents and clean the valve area as directed.
- Too much food: Transfer some food to another bag so the closure and valve remain clear.
- A damaged bag or valve: Inspect for punctures and replace damaged bags.
- Incompatible equipment: Confirm that the bag and sealer are designed to work together.
If a bag containing perishable food has lost its vacuum, its safety depends on the food’s storage time and temperature. Resealing does not make improperly stored food safe.
Frequently Asked Questions
Can I vacuum seal soup or other liquids?
Only use a method specifically approved in your sealer and bag instructions. Loose liquid can enter the pump. If a compatible container is approved for liquids, follow its fill limits and operating directions.
Can I reuse vacuum bags?
Follow the bag manufacturer’s reuse and cleaning instructions. Do not reuse damaged bags. As a cautious household practice, discard bags that held raw meat, poultry, or seafood.
Can I microwave food in a vacuum bag?
Only if the exact bag is labeled for microwave use. Follow its temperature, time, and venting instructions. Freezer compatibility alone does not mean a bag is microwave-safe.
How long will vacuum-sealed food last?
There is no single storage time for every food. Freshness before packing, handling, temperature, and food type all matter. Use food-specific storage guidance rather than assuming vacuum sealing adds a fixed number of days.
Start With a Simple Storage Routine
For your first try, choose one suitable food, portion it, seal a compatible bag, and check the result. Once you are comfortable with the process, make labeling and checking the closure part of your regular routine.
Explore Mehomeli handheld vacuum sealers and compatible vacuum bags to find a setup that fits your kitchen. Check each product page for compatibility and care instructions before choosing.